This Photoshop tutorial will show you how to take a photo that has great potential and turn it into one that will stop people dead in their tracks and have them gazing at the photo.
First off, I got this incredible photo of the puppy free off Flickr. This particular photographer ny156uk has some great photos for commercial use. You can find more free photos for commercial use on Flickr by doing an advanced search.
Before starting, keep in mind that it is important to name your layers and lock the original photo layer. We’ll be creating a few duplicate layers and adding a title will help distinguish the subtle changes of each layer. We also want to keep an original photo layer so that we’ll have the original photo to work off from and not one that has already been altered.
Increase Saturation & Set the Layer Blending Mode to Color
First duplicate the original layer, again we do not want to change the original photo layer. To duplicate the layer, click on the photo layer in the layer palette and either go to the menu under Layer >> Duplicate Layer… or hit the command ctrl + j. Name this layer ‘Color’. Now with that new duplicated layer selected, go to Image >> Adjustments >> Hue/Saturation (or ctrl + u). Drag the Saturation Slider to the right to about +65 (Figure 2). What this does is makes the colors more vibrant. Click OK to close the Hue/Saturation menu. With that layer still selected, change the blending mode to ‘Color’. To do this, go the Layer palette, click on the drop down menu where it says ‘Normal’ (the top most left item) and at the bottom of the list there will be an option called ‘Color’. By setting the layer to Color, we’ll keep the vividness of the colors, while not distorting the photo.
Apply The Sharpen More Filter & Fade
Duplicate the original photo again. This time apply the sharpen more filter (Filter >> Sharpen >> Sharpen More). The sharpness should be overkill, but there is an easy way in Photoshop to undo part of this effect. Go to Edit >> Fade Sharpen More…. This menu will allow you to change to opacity and blending mode of the filter. For our purposes, we’ll just change the opacity to 20%. NOTE: You can only fade a filter directly after you’ve applied it. You can’t come back to it after Photoshop’s history has logged some other action.
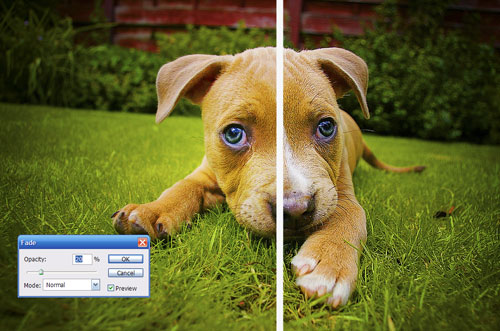
Figure 3. The fade menu almost “undoes” the sharpen more filter.
Overlay Radial Gradient
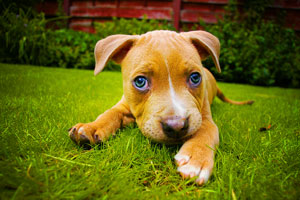
Figure 4. The photo with a radial gradient set to overlay
The next two steps will concentrate on making the dog the focal point of the image. Create a new blank top layer. Take the gradient tool, and with a white to bl ackradial gradient drag out from the center so that the circle is white and the outer regions fade to black. You may need to adjust the size of this circle, but make sure the circle covers a large span. Now set this layer to blending mode Overlay with an opacity of 55%.
Multiply Radial Gradient
Duplicate that radial gradient layer. Change the blending mode to Multiply and opacity 25%. Now go to Edit >> Adjustments >> Levels (Ctrl + L) and drag both black and gray sliders closer together. What this does is make the distance between black and white closer.