This tutorial will show you how to create a banner graphic banner in the same vein of medieval graphics. For this tutorial you will need Adobe Phothoshop CS or better. The tool we will use are the pen, text and shape tools. This tutorial will test your pen tool skills and ability to play around with shapes and layer styles.
Type out your banner text and curve the text
Type out the text you want to go on the banner and then select the text and click on the “Create warped text” button located in the Options Palette. Create a subtle curve, because later you want to create the banner and if its curve too much, it will look awkward. I added some depth to the text.

Figure 1. Warped Text with Layer Style
Create A Background Object
This is optional, but you can create something like a heart or a plaque to which the banner can be in front of. It adds visual appeal and adds height to the graphic. I simply took the heart shape from the shape presets and added a gradient to add depth.

Figure 2. Heart Shape with Gradient Overlay Layer Style
Use the Pen Tool to create the primary part of the banner
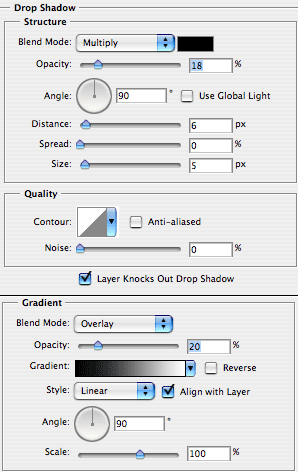
Take the pen tool, and pen out a banner the aligns with the curvature of the text. You’ll want to slightly curve the ends of the banner. As a side note, you can also take the square tool and try manipulating the shape to create the effect you want. Add a drop shadow and a black to white gradient set to overlay to add depth and realism.


Figure 3. The banner layer goes under text layer. The banner needs two layer styles, a gradient and drop shadow.
Create the second fold of the banner
This fold adds accent to the banner, but it is tough to make the fold to look right. My tip is to try to start adding pen tool points where the primary part of the banner would end. By starting the path behind the banner, its easier to conceptualize where the next point should go. Do this step for one side of the banner as you can copy and flip the path later. Copy the effect from the primary part of the banner by right clicking and copy the style effect and past it on the new layer.

Figure 4. The first fold should look like an extension of the previous part.
Create the end of the banner
Like step 4, try to create this part of the banner like an extension of the previous part. Close the banner so that the ends look like a ‘v’. Again copy and paste the style effect over to this layer.